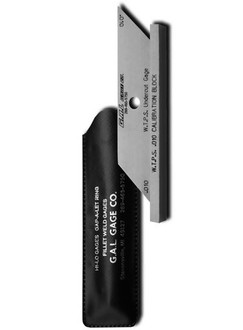
Product Description
The Tri-Gauge is today's most versatile Lever Pit Gauge, with its Metric and dual Imperial Scales. Additionally, the Tri-Gauge serves as a basic Weld Inspection Gauge for; Undercut Depth, Weld Crown Height, a Porosity (diameter) Comparator; and both Metric and Imperial Rules. The Tri-Gauge is fitted with a Patented pointer Offset Correction for improved accuracy and repeatability. Lever Pit Gauges are intended to evaluate corrosion, and not as an absolute measuring tool. The Tri-Gauge is supplied with a Pocket Protector type Case and Instructions.
READING THE SCALE
The operator simply lines up the appropriate Pointer with the desired Scale. Specification or Jurisdiction normally governs the selection of the Scale to use.
Measuring Corrosion (Depth)
Extend the Lever to the maximum depth, so the Scale is also reading a maximum measure. Place the Contact Point into the Pit (or area of corrosion), and gently bring the Scale Plate Base of the Tri-Gauge firmly against the surface of the workpiece. The Scale Window will come to rest at the appropriate depth measurement.
OFFSET CORRECTION
The Contact Point of the Tri-Gauge has been specially formed to be in-line with the contact surface of the Scale Plate Base. This Offset Correction, ensures error is reduced if the Tri-Gauge is not normal to the surface of the workpiece.
MEASURING WELD REINFORCEMENT (HEIGHT)
Place the Lever to a neutral depth, so the Scale is also reading Zero. Place the Contact Point onto the top of the Weld Reinforcement, and gently bring the Scale Plate Base, of the Tri-Gauge, firmly against the surface of the workpiece. The Scale Window will come to rest at the appropriate depth measurement.
MEASURING WELD UNDERCUT (DEPTH)
Weld Undercut measurement is identical to Pit Depth Measurement by simply extending the Lever to the maximum depth, so the Scale is also reading a maximum measure. Place the Contact Point into the Undercut, and gently bring the Scale Plate Base of the Tri-Gauge firmly against the surface of the workpiece. The Scale Window will come to rest at the appropriate depth measurement.
ZERO OFFSET
It is important for the Operator to know if the Tri-Gauge's Lever Arm and Contact Point are zeroed to the Scale. When the Contact Point is in contact with a flat surface, the Scale should read zero. However if there is an offset (positive or negative), the operator must be mindful to add or subtract the appropriate amount of error, thus keeping the measurement accurate.
ZEROING THE CONTACT POINT
When the Tri-Gauge is manufactured a Skilled Technician Zeroed the Contact Point after the Offset Correction was induced into the Lever Arm. The Contact Point can become worn, damaged, or the Offset Correction can be damaged. Any Zero Offset can become a hindrance to the operator, so it may be desirable to Zero the Contact Point.
This Standardization can be performed by Western Instruments or you can attempt it yourself. If you attempt it yourself, you will need a small Ball Peen Hammer, an Anvil (or heavy plate), a Flat Plate, and a fine 6" file. You will need to determine if the Contact Point is too long or is too short. If the Contact Point is too short, it is placed on the Anvil, and the Hammer is used to Stretch the end by lightly taping the Contact Point. After each tap the Tri-Gauge should be checked against the Flat Plate. If the Contact Point is too long, or you have stretched it too much, the Tip is lightly filed from the beveled or inner side (adjacent to the Scale Plate).
WARRANTY: Western Instruments warrants its products, against defects in materials and workmanship for a period of 1year from receipt by the end user. If Western Instruments receives notice of such defects during the warranty period, Western Instruments will either, at its option, repair, replace, or condemn products that prove to be defective. Any warranty is void if the unit has been modified in any way (less the Drilling and proper Deburring of Comparator holes), or if it has been repaired by an unauthorized agency.


 my account


