Product Description
Press-O-Film Replica Tape:
| Grade (descriptive) | Range When Used With Gage (mils) / (um) |
| Fine / Medium | not applicable |
| Coarse Minus | 0.5 to 1.0 / 12 to 25 |
| Coarse | 0.8 to 2.5 / 20 to 64 |
| X-Coarse | 1.5 to 4.5 / 38 to 115 |
| X-Coarse Plus | 4.6 to 5.0 / 116 to 127 |
50 piece roll Optical Grade, C or XC - For use with Positector RTR3D Probe
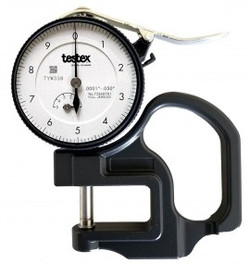
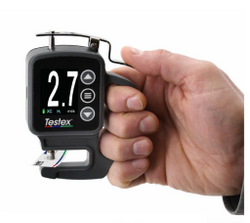
Testex replica tape can be used with a gage to measure the surface roughness ("profile") of blast-cleaned steel in the roughness range 0.8 to 4.5 mils (or 20 to 115 micrometers). Because inspectors, as a rule, have a target profile in mind. it is always best to start measurements with the grade of tape that has the target profile closest to the center of it's range.
Our Instructions webpage details the averaging procedure used in the overlap region between Coarse and X-Coarse grades.
Testex' lowest grade (thinnest) tape, Coarse Minus, should be used only to check measurements at the lower end of the next higher grade, Coarse, while our highest grade tape, X-Coarse Plus, should only be used to check measurements at the high end of the X-Coarse grade range.
Firmly compress tape with the smoothest surface on the rubbing tool provided, applying sufficient pressure to produce a replica with a uniform pebblegrain appearance. You should feel the roughness as you burnish.
Fine/Medium grade material is commonly used in applications in which the replica is analyzed using precision laboratory techniques. This grade is not suitable for use with a "dial thickness gage. Fine grade tape (rarely used) has a thin Gold coating to facilitate electron microscopy. Medium grade tape has a thin Indium coating to facilitate optical interferometric measurement. Fine and Medium grades have the same foam thickness. Only the vapor-deposited metallic coatings differ. "Unmetallized" Medium grade tape is also available without any metallic coating.
All grades are coated onto a tough polyester substrate 2.0 mils (50 um) in thickness.
Because implicit definitions of "roughness" vary between methods, numerical profiles determined using different techniques (replica tape, interferometer, confocal microscope, analog stylus, digital stylus) may yield different values. Always specify the technique used.
Standards Compliance
STANDARDS GOVERNING USE OF REPLICA TAPE TO MEASURE PROFILE
ASTM - (American Society for Testing and Materials) D 4417-14: Standard Test Methods for Field Measurement of Surface Profile of Blast Cleaned Steel
NACE - International (National Association of Corrosion Engineers) SP0287-2016:Standard Recommended Practice: Field Measurement of Surface Profile of Abrasive Blast Cleaned Steel Surfaces Using a Replica Tape
SSPC - PA17 - the Society for Protective Coatings
ISO - International Organization for Standardization: Standard ISO8503-5 Preparation of steel substrates before application of paints and related products - Surface roughness characteristics of blast-cleaned steel substrates - Part 5: Replica tape method for the determination of the profile
Press-O-Film HT is formulated for better performance at the high temperatures (above 140°F or 60° C) encountered in the most challenging environments.
While stable at 140°F (60° C), the current film starts to gradually soften above that temperature. The new formulation adds a 12°F (6°C) safety margin.
Other physical properties remain nearly identical except for some loss of agreement where different tape grades overlap. This effect is most noticeable between Coarse and X-Coarse grades. The new instructions will recommend that where the two grades give different profiles, and both profiles are in the range 1.5 to 2.5 mils (38 to 64 μm), those differing values be averaged.
Tape prices will remain the same and in most applications users will notice little change in the product itself. Press-O-Film HT will be sold on a different label but at the same price. The new version will replace the existing product.
In order to bring replica tape profile measurements more in line with digitally-determined profiles Testex recommends a modification to replica tape’s instructions for use. The new procedure is a formalized recipe for acting on our long-standing guidance that “replica tape measurements are most accurate near the middle of each grade’s range”.
• • •
Press-O-Film Instruction Change:
If a measurement made with either Coarse or X-Coarse grade tape is between 1.5 and 2.5 mils (38 and 64 μm) inclusive, take a 2nd measurement at the same spot with the OTHER grade.
If BOTH readings are in the above range, record the average of the two measurements as the surface profile (peak-to-valley roughness).
Readings made with either grade that are outside this range should be used as is, i.e. without averaging.
• • •
Testex strongly recommends switching to the new (averaging) procedure, but the new tape can continue to be used with the old instructions if user circumstances warrant.
Testex recommends that measurements obtained using the updated procedure be annotated “HT”.
(Older measurements should be annotated “non-HT”.)
The colored segments mark the primary range for Coarse and X-Coarse grades. The white segments indicate the ranges of Coarse Minus and X-Coarse Plus grades.
The effect of these changes is to make Coarse and X-Coarse grade replica tape measurements more comparable with other means of determining profile over replica tape’s primary profile range: 0.8 to 4.5 mils (20 to 115 μm).
The graphic above appears on each piece of tape as an aid to recalling the averaging procedure.
The identifier "Coarse", on rolls of Coarse grade tape, is printed in red. The identifier "X-Coarse", on rolls of X-Coarse grade tape, is printed in blue.


 my account


